Wednesday, July 25, 2012

Fishers Oil Base Deck

Ryan and I finally completed a very challenged deck in Fishers. When I first looked at the deck, it looked like the typical deck that just needed a good pressure washing and then apply the stain. Boy, was I wrong.

The deck was 11 years old and for the first 8 years, the customer had put Thompson water sealer on the deck. Then he decided to stain it with a McKlosky (no longer in business) oil base stain. He put multiple coats on several boards and also replaced several boards. So the deck floor had a very inconsistent look.  This issue was not going to be resolved because the customer wanted to use a semi-transparent stain in a lighter color (dark brown to cedar looking). We were also afraid an oil base stain would not bond because of multiple coats on some of the boards. Oil base is different than waterborne stain in that it seals the deck and if you try to put anything over it, it may not bond and just peel off - even after several years. 

So we stripped the entire deck in order to remove the previous oil base stain.  In fact, we had to strip it twice.  The deck actually had a cedar look when we were done. We would have put a waterbone stain on at that time, but the railing and spindles still had some oil base on them so we went to a Sherwin Williams DeckScape oil base stain.

Steps:
  1. Pressure washed railing, spindles, bench, and floor;
  2. Stripped the deck floor, bench, and spindles (not as intense). We were just looking for a more consistent look for the spindles. We were not worried about the stain not bonding;
  3. Let dry;
  4. Stripped the deck again;
  5. Let dry;
  6. Applied stain to railing and spindles on one day;
  7. Applied stain to floor and bench on another day;
  8. Walk-through with customer. They were happy with the look.
Photos:

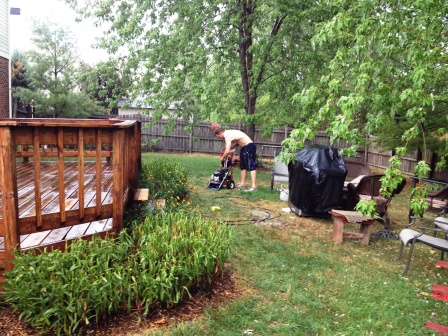
1st round of stripping

Ryan finishing stripping in the rain
 Deck floor stained and drying

 Deck floor drying with 3 boards left

 Deck floor drying - different view

 Deck floor drying - different view

 Deck floor drying -  another view


Deck floor - drying

Ryan finishing up
 Deck still wet from pressure washing


Fishers interior rooms

We received a call on Tuesday from a customer that needed rooms painted immediately because they were putting it up for sale because of a job transfer. I submitted an estimate that night and received approval to start on Wednesday. I had to rearrange several other jobs in order to fit the job in. Normally, Ryan and I can't just start the next day so I had Ryan continue to work on the deck we were doing and I started the job.

We painted the master bathroom, entertainment room, living room, entry way, stairwell, and upstairs hallway. The walls were in bad shape so we used our electric sander on all walls to get rid of all the gunk on the walls. We used a lot of spackle to fill holes and cracks. In normal circumstances, we always put on two coats (part of estimate), but the customer was moving and just wanted it to look presentable so we put one coat of Sherwin Williams ProMar 200 (no VOC) in a flat finish. The color was darker than what was on the walls so it covered.  For all the areas we spackled, we covered with the paint color in order to reduce any flashing.  The walls looked outstanding even with one coat.

Challenges:
  • The entryway was 20 feet so we had to bring in our 24 extension ladder to get to the top.
  • We had to work over the stairwell in order to get the walls over the stairs. Again, it was very steep and we had to use our levelers with both a step ladder and a 12 foot ladder to get to the ceiling. I cut in the ceiling and then Ryan used both a 4' and 12' extension pole with a 9" roller frame to run up and down the walls. 
Steps in completion:
  1. Sanded all the walls;
  2. Washed all the walls;
  3. Removed all electrical plates;
  4. Caulked around baseboards and door trim;
  5. Spackled all holes and dings (there were a lot of them);
  6. Taped all baseboards, window trim,  and door trim with green frog tape;
  7. Masked all carpet with 12" paper in order to catch any drips;
  8. Lightly sanded spackled areas after it dried;
  9. Hit with the finish paint color in order to prevent flashing;
  10. Painted small area where ceiling meet wall in order to hide paint on ceiling and get a better cut line;
  11. Applied one coat of Sherwin Williams ProMar 200 Interior Latex  (flat finish) to all walls except the Master Bathroom where we applied two coats with an eg-shell finish;
  12. Removed all green frog tape;
  13. Removed all masked areas;
  14.  Touched up any areas that we missed or the last painter may have;
  15. Vacuumed all floors; and
  16. Final walk-through with customer.
Note: We used ProMar 200 with no VOC because there was a baby in the house.

Photos:


Thursday, July 12, 2012

Fishers exterior trim

Ryan and I completed a two-day exterior trim job today.  We pressure washed on Wednesday and then prepped, primed, and painted some of the exterior trim today. We used Sherwin Williams Duration exterior paint with a custom color to match the current trim. We spent more time prepping than painting because of all the scraping and caulking that needed to be done. The customer is putting the house up for sale so wanted some of the trim completed.

Photos:


Another Fishers Deck

Ryan and I finished another deck on Wednesday. We pressure washed on Monday, stained the spindles on Tuesday and cleaned the floor again with a Sherwin Williams deck wash, and then applied stain to the deck floor and skirting on Wednesday. We used Sherwin Williams DeckScape stain in a custom color - we matched the stain used last time. We used 4 gallons of stain.

Our only challenge was the customer turned on the sprinklers early on Wednesday morning so we had to wait for the deck to dry and get below 12% moisture.

Finished photos:


Pressure washing and progress photos:


Saturday, July 7, 2012

Fishers bedrooms

Ryan and I completed another small interior painting project on Friday - a master bedroom (Raffia) and guest bedroom (Bee's Wax). There was very little preparation so we were able to complete in a little more than a day.

We used Valspar Signature paint in an eg-shell finish. We normally use Sherwin Williams paints but we decided to use the Eddie Bauer and Waverly lines and the paint really flowed well and covered extremely well. We always put two coats because it definitely covers better plus it is guaranteed to be washable.

Photos:


Wednesday, July 4, 2012

Fishers interior rooms

Ryan and I completed another interior job on Tuesday evening. It was small compared to the last one we did, but it was still some work.  We prepped and applied two coats of ProMar 200 (eg-shell sheen) to the walls only  in the living room and kitchen.  There weren't a lot of challenges except nail pops and some holes in the wall.

Finished photos:


 Before Photos: