Saturday, September 29, 2012

Noblesville interior rooms

Ryan and I finished up a large interior painting project on Friday.  Our customer is putting her house up for sale so we prepped and painted ceilings and walls in the family room, kitchen, entryway, stairwell, hallways, and master bedroom and bath. We put two coats of Sherwin Williams ProMar 200 in an eg-shell finish. We used "Eminence" ceiling paint. This was a difficult project because of all the stained wood trim that we had to ensure we kept the paint off and also clean up the trim that had paint on it from the previous painter. This slowed us down considerably.  It turned a 4 day project into 5 days.

Steps:

  1.  Sanded all the walls;
  2.  Washed all the walls;
  3. Spackled all the holes and other dings;
  4. Lightly sanded all the areas we spackled with 220 grade sandpaper;
  5. Caulked with quick drying caulk (Bolt) all the cracks between the walls and trim;
  6. Touched up the trim with matching brown paint so the previous paint would not show and also get a better cut-line;
  7. Taped out all the trim in order to keep our paint off the trim;
  8. Painted ceilings;
  9. Applied first coat of paint and let dry for 4 hours;
  10. Applied second coat of paint;
  11. Applied a bead of caulk around the bathroom sinks and also the kitchen sinks. It makes such a difference in appearance plus better in areas where there is a lot of moisture;
  12. Pulled all the tape;
  13. Touched up all trim in order to ensure tight cut-lines; and 
  14. Vacuumed.
Challenges:
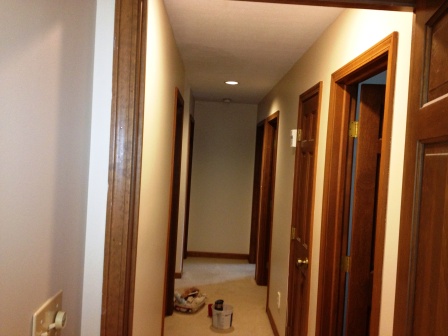
  • The brown stained trim made it more difficult for a couple of reasons. It had a lot of paint on it from the previous painter and it had never been caulked in. In order to have straight cut-lines, you need to caulk and touch-up the top lip in order to look professional and clean.  
  • The crown molding had a very small lip that made it difficult to touch up the paint that was on it. We had to apply the brown paint over the stain and not worry about getting some on the wall and then cut-in the wall.  We used brown paint because a matching stain just would not cover very well because of the yellow paint on the stained trim.
Lessons learned:
  • Caulk in trim after you paint the walls because tape does not adhere very well to caulk and it will seep plus pull away;
  • Apply the touch-up paint to the trim before you put the wall paint on in order to get better cut-lines. 
Photos:


Saturday, September 22, 2012

Fishers interior rooms

Ryan and I finished a large painting project yesterday. It included two coats of Sherwin Williams ProMar 200 (no VOC) in a flat finish on the walls and Sherwin Williams Eminence ceiling paint on two ceilings. We did the ceilings in the master bedroom and foyer and the walls in the foyer, hallway, stairwell, bedroom, master bedroom and bath. We used 10 gallons of paint.

Steps:

 1 - Sanded all walls with an electrical orbital sander;
 2 - Washed all walls after sanding;
 3 - Spackled all nail holes, nail pops, and other nicks on the walls;
 4 - Lightly sanded all spackled areas;
 5 - Taped all woodwork with green frogtape;
 6 - Painted ceilings;
 7 - Applied 1st coat and waited 4 hours;
 8 - Applied 2nd coat;
 9 - Touched up ceilings, baseboards, and other woodwork; and
10 -Vacuumed.


Challenges:

1 - The stairwell was steep so we had to bring in our levelers in order to reach ceiling;
2 - The walls hadn't been painted or repaired for six years so a lot of prep necessary;
3 - There was a lot of paint on the ceilings from previous painter so had to touch-up; and
4 - The ceilings did not have a very good cut line so taped the ceiling in order to get a straight line.


Photos:

Fishers fence

Ryan and I finished a cedar fence the week of 9/17/12 after we dealt with wet conditions the week before.  We finally got the moisture down below 10% and applied 16 gallons of Sherwin Williams Deckscape waterborne stain.  The color was "Cedar Bark" and the customer was very pleased with it.

Photos:


Friday, August 10, 2012

Is it latex or oil-base on your room walls?

To tell whether your current wall color is a latex or oil-base paint, wet a white cloth with rubbing alcohol and rub it on your wall. If the paint color lightens and begins to transfer onto your wet cloth, it is definitely a latex paint. If the alcohol does not remove any color, it is an oil-base paint.

Thursday, August 9, 2012

Fishers exterior trim

Ryan and I finished the exterior trim on a ranch home in Fishers. The couple were putting their home up for sale and wanted the trim painted before they put up for sale. The Sherwin Williams Duration paint in a satin finish really gave it a lot of curb appeal.

Photos:


Indianapolis exterior trim

Ryan and I finished another exterior trim painting project last Friday. We spent one day prepping the house after pressure washing it - it was a foreclosed home and it definitely needed a lot of caulking and priming. There were also rotting boards that had to be replaced. We used Sherwin Williams Exterior Duration paint that is much thicker than your normal paint.

Photos:

Finished trim


Prep photos:


Wednesday, July 25, 2012

Fishers Oil Base Deck

Ryan and I finally completed a very challenged deck in Fishers. When I first looked at the deck, it looked like the typical deck that just needed a good pressure washing and then apply the stain. Boy, was I wrong.

The deck was 11 years old and for the first 8 years, the customer had put Thompson water sealer on the deck. Then he decided to stain it with a McKlosky (no longer in business) oil base stain. He put multiple coats on several boards and also replaced several boards. So the deck floor had a very inconsistent look.  This issue was not going to be resolved because the customer wanted to use a semi-transparent stain in a lighter color (dark brown to cedar looking). We were also afraid an oil base stain would not bond because of multiple coats on some of the boards. Oil base is different than waterborne stain in that it seals the deck and if you try to put anything over it, it may not bond and just peel off - even after several years. 

So we stripped the entire deck in order to remove the previous oil base stain.  In fact, we had to strip it twice.  The deck actually had a cedar look when we were done. We would have put a waterbone stain on at that time, but the railing and spindles still had some oil base on them so we went to a Sherwin Williams DeckScape oil base stain.

Steps:
  1. Pressure washed railing, spindles, bench, and floor;
  2. Stripped the deck floor, bench, and spindles (not as intense). We were just looking for a more consistent look for the spindles. We were not worried about the stain not bonding;
  3. Let dry;
  4. Stripped the deck again;
  5. Let dry;
  6. Applied stain to railing and spindles on one day;
  7. Applied stain to floor and bench on another day;
  8. Walk-through with customer. They were happy with the look.
Photos:

1st round of stripping

Ryan finishing stripping in the rain
 Deck floor stained and drying

 Deck floor drying with 3 boards left

 Deck floor drying - different view

 Deck floor drying - different view

 Deck floor drying -  another view


Deck floor - drying

Ryan finishing up
 Deck still wet from pressure washing